
Introduction to Servo Motor
Servo motors are DC motors that can be controlled at a particular position. You can also say that servo motors are basically a rotary actuator or linear actuator that allows for their control at specific angle.
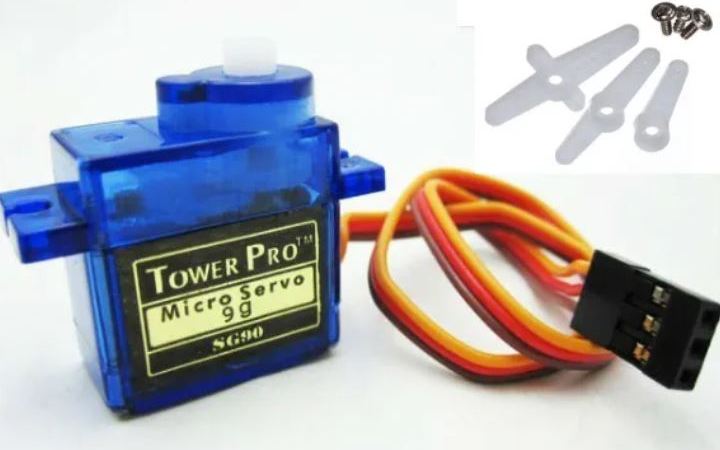
According to Wikipedia Servos (also RC servos) are small, cheap, mass-produced servomotors or other actuators used for radio control and small-scale robotics.

The servo motor is usually needed for electromechanical projects. Or more commonly in robotic applications. Whenever you have a requirement where you need to control the angle of rotation of the axis of a motor, you can use the servo motor.
The maximum range of the shaft is 180 degrees. That means that the angle that the shaft turns is at most 180 degrees. The output gear has a mechanical stop, so it is not possible to turn the shaft above 180 degrees.
Working of Servo Motor
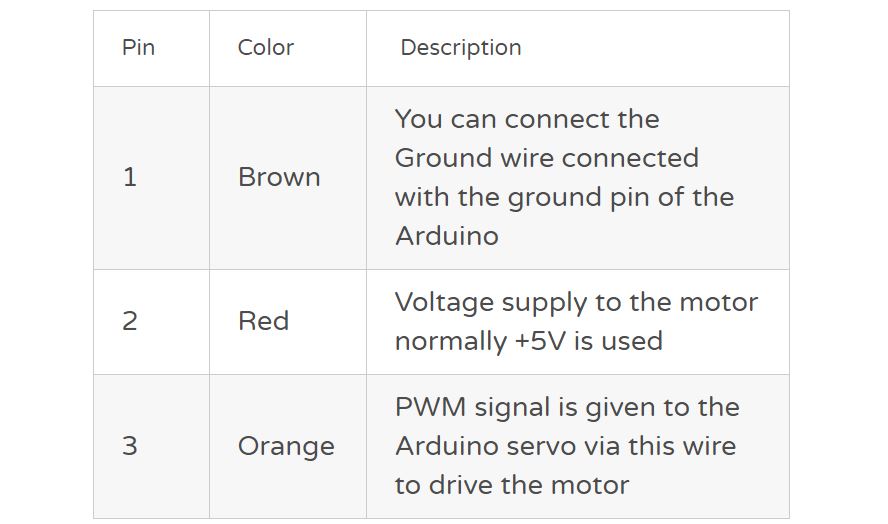
Servo is a general term for a closed loop control system. A closed loop system uses the feedback signal to adjust the speed and direction of the motor to achieve the desired result. RC servo motor works on the same principal. It contains a small DC motor connected to the output shaft through the gears. The output shaft drives a servo arm and is also connected to a potentiometer (pot). The potentiometer provides position feedback to the servo control unit where the current position of the motor is compared to the target position.
According to the error, the control unit corrects the actual position of the motor so that it matches the target position.
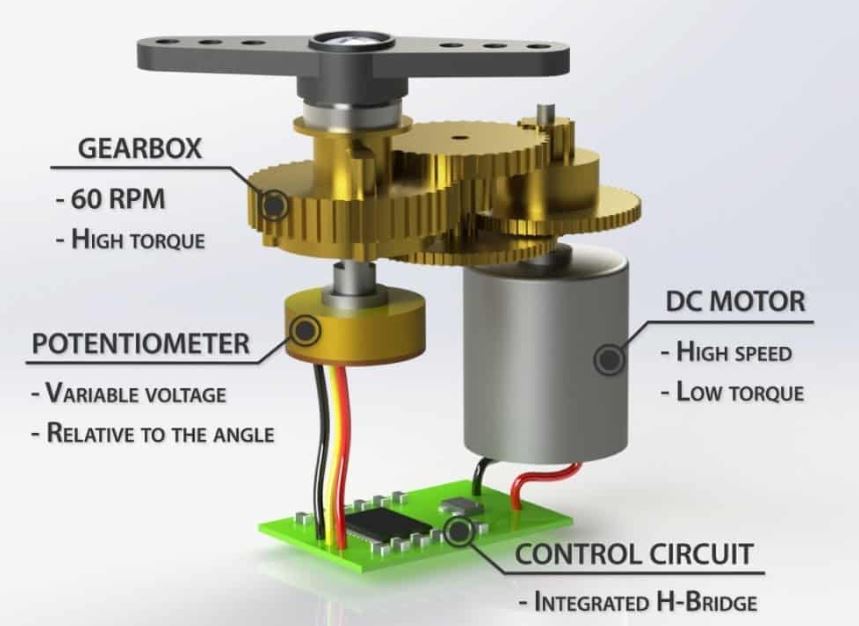
- An electric motor: The thing that converts electrical energy to mechanical energy. It is a rotary machine.
- A control system: It controls the angle of rotation of the axis by applying a control signal.
- A drive system: It contains gears that can increase or decrease the speed and torque.
- A potentiometer: It is connected to the central shaft, and helps the control system to monitor the angle in which the motor’s shaft is positioned
PWM in Controlling the Servo Motor
The rotation angle of the servo motor is controlled by applying a PWM signal to it. By varying the width of the PWM signal, we can change the rotation angle and direction of the motor.
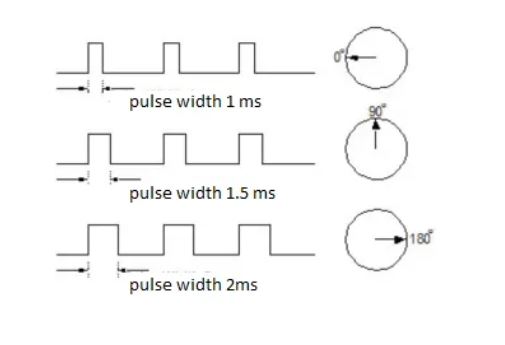
- If the pulse is high for 1ms, then the servo angle will be zero.
- If the pulse is high for 1.5ms, then the servo will be at its center position.
- If the pulse is high for 2ms, then the servo will at 180 degrees.
- Pulses ranging between 1ms and 2ms will move the servo shaft through the full 180 degrees of its travel.
Interfacing Servo Motor With Arduino UNO using Potentiometer
Here servo Motor is interfaced with Arduino using Potentiometer. The Potentiometer is used for the angular position control of the Servo. According to the position of potentiometer the angle in the Servo Motor changes.
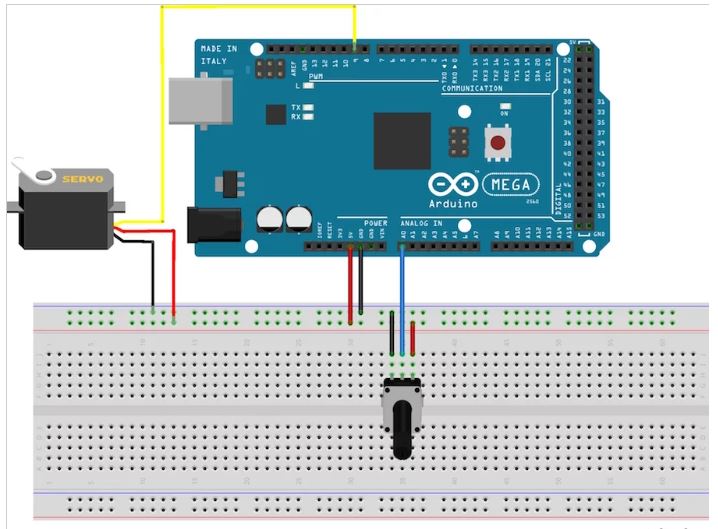
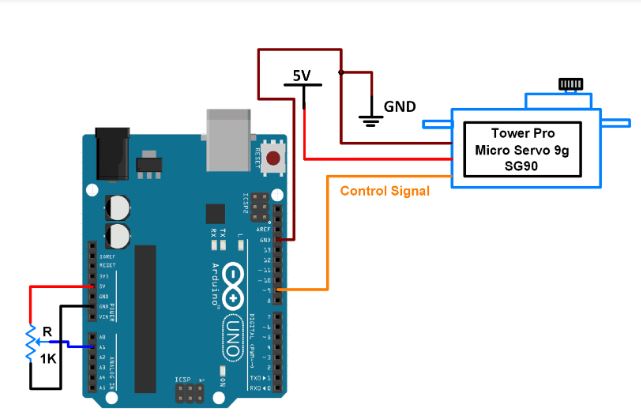
According to the adjustment of the potentiometer the analog input to the A1 pin of arduino varies from 0-1023 analog value(0-5V), so as the angular position of servo motor varies from 0-180 Degree. The arduino code for this function is given below.
Arduino code for Above circuit
// Servo Motor control using Arduino
// ENGG HOME
//https://engghome1.wordpress.com/

#include <Servo.h>
Servo myservo;  /* create servo object to control a servo */
int potpin = 1;  /* analog pin used to connect the potentiometer */
int val;    /*  variable to read the value from the analog pin */
void setup() {
  Serial.begin(9600);
  myservo.attach(9);  /* attaches the servo on pin 9 to the servo object */
}
void loop() {
  val = analogRead(potpin);    /* reads the value of the potentiometer (value between 0 and 1023) */
  Serial.print("Analog Value : ");
  Serial.print(val);
  Serial.print("\n");
  val = map(val, 0, 1023, 0, 180);     /* scale it to use it with the servo (value between 0 and 180) */
  Serial.print("Mapped Value : ");
  Serial.print(val);
  Serial.print("\n\n");
  myservo.write(val);                  /* sets the servo position according to the scaled value */
  delay(1000);                         /* waits for the servo to get there */
}
Hope you understood the Servo Motor Detail and it’s control using Arduino . Thanks for your time in reading our post and do not hesitate in sharing this post to your friends and collegues.
Keep Reading, Keep Learning
CHEERS!!
Regards,
Credits:
http://www.electronicwings.com, http://www.allaboutcircuits.com, http://www.technobyte.org, lastminuteengineers.com. engghome1.wordpress.com
